Windows Application Information, Security Rating and Removal Guides
Windows Application Information, Security Rating and Removal Guides
When people buy a new computer or perform a clean installation of Windows 10, the computer may be set a default name like “windows-user-pc” or “TUF00046491eTE”. Some people just don’t like the name and want to customize a new name they like. If you don’t know how to do, here are just detailed instructions available for you to rename the computer under Windows 10 operating system.
Different Windows system requires different steps to change the computer name, considering the Win 10 is the newest and also most popular system version in recently, I will showcase the specific steps to change the PC’s name in Win 10.
1. Right-click on Windows icon at the bottom left corner
2. Select the System on the menu, and associated window will be opened
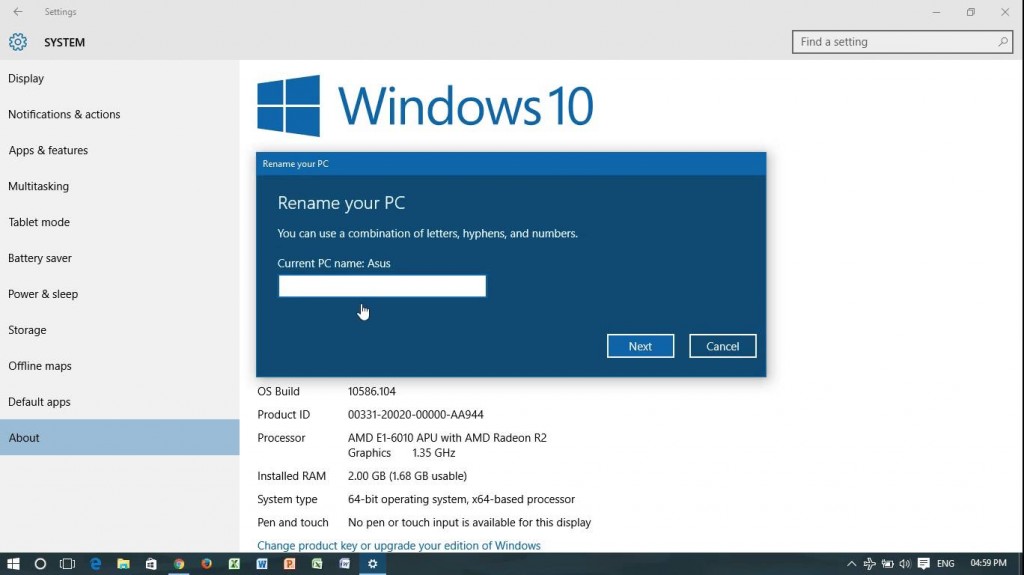
3. Click on About on the left pane, and click on Rename PC button
4. Type your PC’s new name, and click Next
5. After that, you will receive a message which need to restart the computer, click on Restart now and your computer system will be rebooted immediately
6. After restarting your computer, you will find that the PC’s name has been changed


Comments
Leave a reply